Top 8 Catering Mistakes: Don’t Let These Happen to You

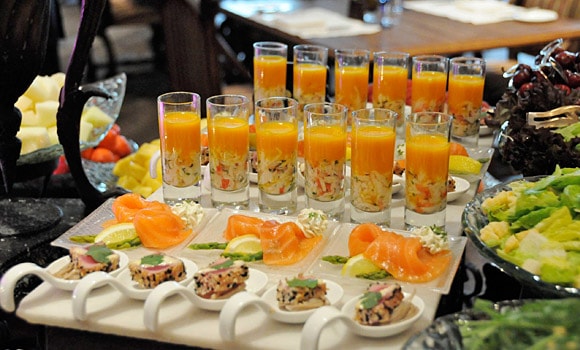
Catering is about more than just the food you serve at your event – it affects the overall atmosphere of the event. Rude servers, bad timing, or undercooked dishes can make your life a lot more stressful. We’ve rounded up some the top catering mistakes and tell you how to avoid them.

1. Miscommunication: Create a contract so that miscommunication will not be a problem for your event. Make sure the caterer has added detailed information on their proposal including the arrival time of staff as well as any special requests you may have asked for (ie–a gluten free entree option for your Uncle Mike).

2. Attempting “do-it-yourself” catering: Though it may seem like a great way to save money, doing your own catering for a large event or wedding will likely cause more stress than it’s worth. Sure, you could ask your cousin to bartend, but a good caterer will have well-trained staff who work together on a consistent basis. If you are concerned about cost, opt for passed hors d’oeuvres rather than a served dinner.

3. Not booking enough time: Make sure that you work closely with the caterer to ensure that you know exactly how many hours they will show up before the event and stay after the event. Most caterers will allow one hour for their staff to breakdown and clean up–so if you’re renting a venue by the hour or shift you’ll need to allow enough time for this to happen.

4. Not checking for guests’ allergies: The worse thing that could happen at your event would be an allergic reaction, so have everyone list allergies on their RSVP. Ask that the caterer include this note on their seating chart and menus used by their kitchen and waitstaff.

5. Booking a catering venue that is too small: Always err on the side of caution when booking a venue and always overestimate the number of guests who will arrive, especially to account for those who might bring an extra guest.

6. Not getting references: Ask your caterer for one or two references and be sure to contact them with specific questions that are of concern to you.

7. Dishes are too unfamiliar: Not all of your guests may be foodies, so keep the menu a mix of the familiar and the exotic.

8. Catering Menu isn’t seasonal: Be wary of caterer with menus items that are out-of-season ie–strawberries in January. Chances are this caterer doesn’t change the menu often and is using sub-par ingredients.

Top 10 Tips to Hiring a Rock Star Caterer

Hiring a caterer for the first time can be a little overwhelming. Sure, they say their food is great, their servers are impeccable, and that everything will go smoothly. But how do you know that you’re really getting the best deal? Here are some questions that everyone should ask their caterer, before the day of the event.

1. When can you schedule a taste sampling of the food? This is a critical question for determining whether you want this caterer to work for you.

2. Which items will the caterer provide, and which items do you need to provide? Be sure to ask about linens, table runners, tables, chairs, decorations, and table settings.

3. How many servers are on the wait staff, and how many does your event need? The wait staff needs to be highly professional, and your caterer should be able to provide details on the number needed for your event.

4. How accommodating will they be on special food needs, allergies, and vegetarian options? They should be willing to offer a variety of options for all your guests.

5. Can they show or provide you with sample photos of events similar to yours? Seeing professional photos taken of other similarly sized and themed events will help you gauge how your event will turn out.

6. Does the caterer provide a bar, or do you need to hire a separate bartender? Some catering services will not allow the client to provide his or her own beverages–so be sure to ask if this is a possibility.

7. Who are some of your previous clients? If you are planning a corporate event, seeing prestigious past clients will boost your confidence.

8. Who will be responsible for cleaning up and to what degree will the event be cleaned up? You don’t want to be left with a big mess on your hands.

9. What are the various pricing options and how can I save money? This is obvious! Make sure you’re aware of any extra set-up or take down fees. Your caterer should be able to provide you a clear idea of pricing.

10. Last but not least–Can you feel their passion? What separates the good from the great in any business–and especially in catering–are those that are the most jazzed about what they do. This will come through in their food and service. Inspired caterers will go the extra mile in making sure your needs are served. If you get the sense the passion isn’t there–move on!

A Caterer’s Top 8 Tools of the Trade for Home Use

No, we’re not talking about chafing dishes! We’ve culled out 8 practical and aesthetically pleasing kitchen tools for you to use at home to make every party look like a catered event.

1. Strawberry Huller: What is that random gadget, you might be thinking. It’s the perfect tool for making quick, effortless yet still visually appealing desserts. It helps you quickly remove the insides of a strawberry, which then can be filled with cream, ricotta or chocolate for a cute dessert. Chef’n Strawberry Huller online at Williams-Sonoma, $7.95.


2. Bamboo cutting boards: These are the only cutting boards you won’t want to whisk away quickly when guests arrive – the attractive bamboo wood makes them both super strong and more visually pleasing than the plastic kind. Totally Bamboo 3-Piece Cutting Board Set from Amazon, $18.37.


3. We love this minimalist mortar and pestle set from Montreal ceramics brand Designlump, http://designlump.blogspot.com $65.


4. Porcelain appetizer spoons will make your appetizers look just like a catered event  – it’s all in the presentation.

Crate and Barrel, $0.95 per spoon.


5. Slate cheese markers will help turn a regular wine and cheese night into a special event by giving that extra touch. www.wineenthusiast.com, $14.95.


6. Not only is this whisk extremely durable with flexible plastic tines, it also looks great in your kitchen. So go ahead and throw out your boring regular aluminum one! Normann-copenhagen.com, $26.


7.These teardrop shaped serving boards resemble artists pallets or guitar picks to us. Either way, they’re not your traditional serving boards and they bring your table to life. Uncommongoods.com, $80-$115.

8. The ergonomical, cool design of this garlic rocker is actually very practical as well: instead of clamping, you simply rock the tool back and forth across the garlic clove to crush garlic instantly. Uncommongoods.com, $15.

An Eggcellent Occasion: Hosting the Perfect Easter Brunch

Easter’s just around the corner, and every family has their own special way of celebrating. For those with young kids, the day usually revolves around Easter egg hunts, baskets, and candy. But grownups can have Easter fun too! Hosting an Easter brunch for family or friends can liven up the holiday and keep it from being completely kid-centric. Here are some DIY Easter brunch tips that will wow your guests and look like it was catered.

Come up with many options-Consider the guests coming and create your dishes around their tastes and preferences. A great mix would be one dish involving eggs, like an omelet or soufflé, an assortment of baked goods or pastries (either made or picked up…no one’s telling), a variety of fresh fruit, and bacon. Don’t forget the coffee!

-Be creative with your dishes- Have fun with the main dish or dessert option, and make something out of the ordinary with seasonal ingredients. For a main dish, try a spinach and panchetta quiche, baked eggs with fennel or spinach, or a smoked salmon and asparagus frittata. For dessert, consider creating individual fruit, yogurt and granola parfaits or topping waffles with chocolate and coconut.

Create the perfect center piece- Spring holidays are great for decorating the table because you can find so much inspiration from nature.  A beautiful arrangement of tulips, a nature scene with moss and dyed Easter eggs, or egg shaped candles arranged on a tray all look elegant and unique. Accents like place cards and sage green place mats will add to your table.

Make an Easter cocktail, or go tried and true – Easter’s not traditionally known as a festive holiday, but who says it can’t be? Either go classic and serve mimosas or Bloody Marys, or consider some alternatives, like taking inspiration from all the candy and concocting a delicious watermelon or raspberry flavored drink.

-Consider outdoor options- Even if it’s too chilly to host an outdoor brunch, try to get everyone out in the fresh air to enjoy springtime. If space is a consideration, go up to the roof for drinks.

-Host an activity to entertain the kids- Create a crafting station in one room to entertain the children and/or guests’ children after the meal. Since you won’t want to bother with messy dyes while playing hostess, consider dyeing some eggs in advance and giving the children colorful felt, markers, and glue so they can create birds, pigs, or egg people!


With these DIY catering tips, your Easter celebration is sure to be a hit!

The Inside Scoop on How to Find a Wedding Caterer

You want your wedding to be the perfect celebration of you and your spouse’s future together. You want every detail to be perfect, no matter how big or how small. That’s why choosing a wedding caterer can be such a huge decision for a bride-to-be, because having the right food at your wedding is crucial to you and your guests’ overall experience. We’ve put together our top tips for for you to learn when and how to choose the right caterer for your wedding:

  1. Ask your friends – A personal reference can go a long way and really tell you about the quality of the caterer. Think back to a wedding when you were really wowed by the food, and contact that friend to get in touch with her caterer.
  2. Check online reviews–What did we do before the Internet? Make sure to run a search on caterers in your area and use online review sites like Yelp to help narrow your search. Bridal magazine websites can also be helpful. Try typing your location + catering to find a local catering directory with lists of all the options in your city.
  3. Keep a list – Begin by gathering the names of 5-10 catering companies you have heard positive things about, and keep room on your list for price comparison and notes.
  4. Schedule meetings –Meet face-to-face with the catering company to talk budget and availability. The attitude of the caterer can make or break the experience for you, and you want to make sure this is someone you can negotiate and work with to make your wedding perfect.
  5. Ask for references –Often people forget this important step, but after meeting with a caterer, make sure to ask for references and contact them to ensure the caterer isn’t overselling his or her talents.
  6. Schedule a tasting – Now is the time to determine the details of the food and service – will wine be provided? What vegan or vegetarian options do they have? And most importantly, how good does the food taste? If you don’t like it, no one will. Make sure to ask the tough questions now before you find out the big day that the company doesn’t provide bartenders.

With these tips, it should be smooth sailing when you set out to choose a wedding caterer!

Top 8 Wedding Menu Tips from a New York City Caterer

Choosing the right caterer that will work with your price range and the style and of your wedding is crucial. Of course great good always contributes to the success of an event, but there are other things to consider as well.  Here are 8 tips to help you choose a wedding menu and style to match your big day!

  1. Set a tone. It can be difficult to choose between a sit down dinner or passed hors d’oeuvres, and deciding on the mood of your reception will influence your decision. For a more serious, elegant event, opt for a sit down meal. If you would prefer to have a slightly more casual evening, allow your guests the mobility of choosing from a wide variety passed hors d’oeuvres as they dance the night away with the uber trendy “cocktail style” reception.
  2. Choose seasonal menu options. Not only will this ease the burden on your budget, but it will also vastly improve the flavor and quality of your menu.
  3. Impress your guests. If you are going a traditional route with your menu, make sure to include one appetizer or dish that is unique – you want your guests to remember your wedding dinner as being special.
  4. Presentation and serving is key. Don’t serve any “bite size” items that are actually large and awkward to eat. You want your guests to feel comfortable and at ease as they mingle with each other – not embarrassed as they try to fit a massive piece of sushi into their mouth in one bite. Choosing the right caterer will ensure that dishes are both beautifully and creatively displayed, yet practical to eat.
  5. Create a budget, and stick to it. Don’t leave yourself with post-wedding blues after splurging on unnecessary items. A good caterer is essential for providing the expertise for how to stretch a tight budget while maintaining presentation and quality.
  6. Consider allergies and eating preferences. While you want your menu to be unique, remember that not all guests are adventurous eaters and some may be gluten-free, lactose-intolerant or vegetarian. Make sure if you’re opting for a sit down dinner that there is a hearty vegetarian entrée option.
  7. Try a dessert bar. Even if you have a sit down meal, a themed dessert bar is a cute and fun twist on the normal slice of cake option. You could opt for a milkshake bar with different flavors, crepe bar, or a make-it-yourself cookie bar with cute take-out boxes for each guest to fill.
  8. Check out the already created menu options, or make your own. At Sweet Basil Catering we pride ourselves on creative, seasonal wedding menu options – but we are also completely open to ideas or favorite recipes from you! Open communication is best for creating a menu that perfectly matches your wedding’s theme.

Impress your friends-Become a Cheese Connoisseur

I don’t know anyone not obsessed with cheese (except those sad lactose intolerant friends, a pity!). There’s just something incredibly satisfying about cheese, whether it be a delicious smattering of varieties on a great cheese platter served with wine or local samples at the farmer’s market. For such a staple ingredient, there are many varieties that the average buyer isn’t aware of. So this weekend, skip the wine tastings (everyone’s a wine expert these days anyways) and instead try buffing up your skills by becoming a cheese connoisseur. You’ll impress your friends and party guests when you whip out your secret talent!

Of course, the next question is, how? I would suggest taking a class with friends; it will be a fun experience that will also increase your knowledge!

Artisanal Premium Cheese, located at 483 Tenth Avenue, features a full schedule of available classes, with 13 different options for March alone. Its website states that each class is around 90 minutes long and is preceded by a 30 minute welcome with wine, fondue and cheese platters! Can’t complain about that. More information can be found here: http://www.artisanalcheese.com/Events_Calendar/

For the truly dedicated, another option is a “Cheese Boot Camp” offered by Murray’s, located at 254 Bleeker St. At $695, it’s definitely a pricier option but could be a fun event for couples and true cheese aficionados. The weekend long boot camp offers five different sessions that will teach you everything from the chemistry and history of cheese to how to create the perfect cheese plate and which beverage to pair with which variety of cheese. More information about the boot camp can be found here: http://www.murrayscheese.com/classes/murrays-boot-camp/.

Fortunately for the less intense (and thriftier) among us, Murray’s also offers a wide array of classes, focusing on everything from beer and cheese pairings to organic cheeses. Even better, they offer great cheese guides for free on their website so you can brush up on your skills before hosting your next party!

Your Perfect Match: NYC Dining Guide for Any Kind of Valentine’s Day

For some, Valentine’s Day is a wonderful day of presents, chocolate, and a romantic evening. For others, it can be a slightly annoying reminder of continued single-ness. No matter whether you’ll be spending Valentine’s Day with a significant other or with your girlfriends, our guide has the perfect restaurant for your celebration!


The New Couple: 

You’ve only been dating for a few weeks or months, so no need to overdo (or overspend on) Valentine’s Day! Try a cute coffee shop for desserts and espresso to keep the night low key and stress free. Try Prodigy Coffee in the West Village for great gourmet coffee and a small but sleek interior. Located at 33 Carmine St. (212) 414-4142.


Kahve’s motto is “love in coffee & food,” and if you arrange a Valentine’s date here, perhaps you’ll wind up with all three things. Their menu features specialty signature drinks like the Zebra Mocha, and coffees from all over the world. Located at 744 9th Ave. (212)256-0207.


The Married Couple:

You’ve been together for a while now, but Valentine’s Day should still be a special occasion! It’s a great excuse for an upscale, fancy night of gourmet dining with your loved one.

Try the $105 prix fixe menu at Robert, featuring three courses like jasmine pearl tea risotto with porcini and shaved truffles. It also features a gorgeous view and incredible décor. Located at the Museum of Arts and Design, 2 Columbus Circle, 9th floor.


Nothing speaks romance like French cuisine, and Le Périgord is the perfect restaurant for l’amour. Its $65 prixe fixe menu includes items like roasted salmon, roasted duck with seasonal fruits, and grilled filet mignon with black truffle sauce. Located at 405 East 52nd St. (212) 755-6244.


Single Ladies:

Valentine’s Day is the perfect excuse to go out for drinks with your girlfriends and avoid couples at all costs!

Try The Volstead in Midtown for a very Sex and the City-esque night. Try “the Bootlegger,” made with Crown Royal, peach Schnapps, Chambord and cranberry juice. Located at 125 E 54th St. For more information, call (212) 583-0411.


For a more themed night, try the Anti-Valentine’s Protest at The Roosevelt Hotel’s Vander Bar, which will be featuring half price cocktails and free wine tasting.

Vander Bar, 45th St. at Vanderbilt Avenue, (212)-885-6131


Just Beet It: A Refreshing Winter Salad

Every chef, mom, and just generally healthy person knows that one food group trumps all in the quest for good health: vegetables! However, when it gets cold and snowy outside, I don’t know many people who crave a nice, warm…salad. If anything, most people turn to carbs and hearty soups for comfort food during the winter, which can lead to a dearth of vegetables in their diets.

Enter: beets. This vegetable’s hearty texture, beautiful color and availability in winter make it the perfect addition to a winter meal. Additonally, beets boast a plethora of health benefits, ranging from low caloric content to high folate, B-complex vitamin, and potassium content. They are also a great source of antioxidants. Even kids will enjoy this delicious vegetable if prepared in the right way.

Try this recipe below for a creative way to add beets to your winter menu!

Beet and Blood Orange Salad
5 medium beets
2 blood oranges (segments removed)
3 T olive oil
2 t salt
1/4 t pepper
2 t orange zest
small handful of mint torn to small pieces
Serves Two

Preheat the oven to 400.
Wash beets well, cut off ends, and remove the skin with vegetable peeler.
Cut beets into 1.5” pieces.
Toss in olive oil, sprinkle with salt, pepper and orange zest and lay out flat on a tin foil lined baking sheet.
Bake until tender, about 40 minutes.
Remove from oven and toss with mint and blood orange segments. Serve warm.

Sushi Made Simple

Beginner Sushi Guide: Making Norimaki

Whether you’re hosting a party at your own home, or you’re invited to attend a potluck dinner, you often need to make crowd-pleasing appetizers. One creative hors-d’oeuvre that’s always bound to impress is sushi; however, making sushi can seem like a daunting task for the non-culinary among us. The easiest form of sushi to make is probably norimaki – the simple, traditional rolls (think California rolls). These are great, easy appetizers and can be filled with non-raw ingredients for squeamish party guests.

Ingredients & Materials: (all can be found at your local Asian food grocery)

-sushi rice (the best kind is short-grain oval rice, I prefer Nishiki brand)

-nori sheets (one sheet per roll of sushi)

-Powered wasabi

-Rice wine vinegar

-Whatever ingredients you choose for the filling- anything from raw fish to cooked fish, shrimp, radish, cucumber, or carrot.

– Bamboo maki-su (rolling mat)

Step 1: Make the rice

First take 1 ½ cups rice and wash it in a bowl to remove the extra starch.
Then, put it in pan with 2 cups water, and bring to a covered boil.
Turn the heat to low and simmer until all the liquid is absorbed.
After that, turn off the heat but leave the rice covered and let it stand for 10 minutes.

Step 2: Prepare the vinegar

While the rice is cooking, take ½ cup vinegar and add salt and sugar to it (alternatively, you can buy pre-seasoned vinegar at the store).

Step 3:

After the rice is done, and while it is still warm, spread it out on a wooden plate or bowl using a wooden spoon and drizzle the vinegar over top. The rice sticks less to wooden utensils, and saves you from a big sticky mess.

Step 4:

To help the rice dry and absorb the vinegar, fan it with a stiff piece of paper. This process will also give the rice a nice shine.

Ta-da! The rice is done, and it is now time for the fun stuff.

Step 5:

Make wasabi by taking a tablespoon or two of dry power and putting it a bowl with a little cold water to form a paste.

Step 6: Making the rolls

Use the bamboo sushi mat by laying down with the flat sides of the wood facing down. Set a sheet of nori on the mat, rough side facing up and smooth side facing down.
Next, spread about a 2 inch wide band of rice across the bottom of the nori sheet.
Dab in some wasabi all cross the middle of the rice (for spicy rolls)
Then, place your ingredient in the center of the rice. For instance, if you are making a simple cucumber roll, take a long thin rectangular piece of cucumber and center it in your roll.

Step 7: Rolling the norimaki

This is the trickiest step! Once you are satisfied with the ingredients in your roll, begin to roll the norimaki by using your hands to simultaneously roll the nori sheeting over the filling while using the mat as a tool to help you roll. Watching YouTube videos may help you get the rolling motion down, but remember that practice makes perfect!
Before you have fully rolled the sushi, dampen the edge of the end of the nori sheet with a little water, which will act as an adhesive to ensure the roll sticks together.

Step 8: Cutting the roll

Use a sharp knife with a moistened blade to cut the roll into pieces. S
Slice down the roll in half first, and then create 3 pieces from each half.
Each roll should make about 6 equal pieces.

Serve with wasabi, pickled ginger and soy sauce! Display your sushi on a large glass tray or platter in a visually appealing way to really impress guests.

I hope this helps those brave enough to try making sushi for the first time! It is an art that will get easier with experience.